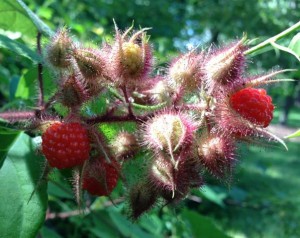
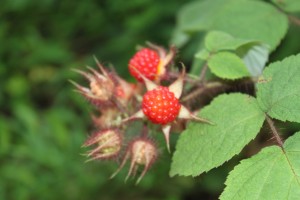
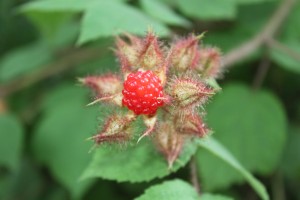
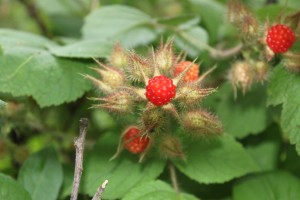
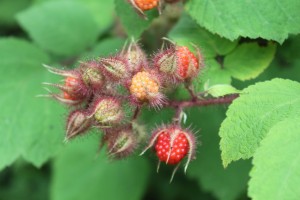
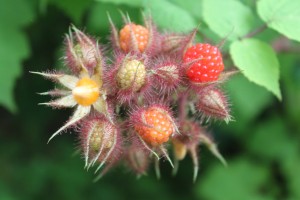
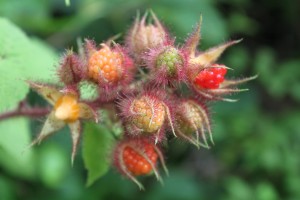
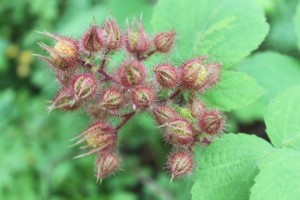
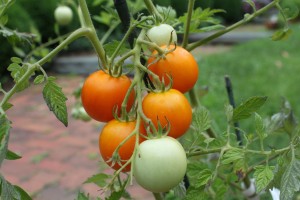
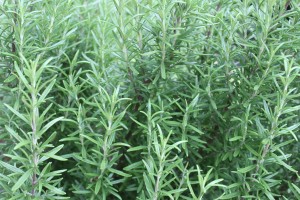
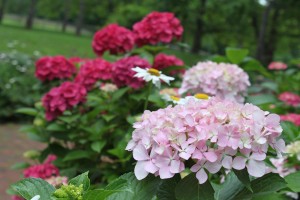
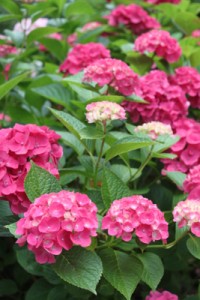
more photos from the yard:
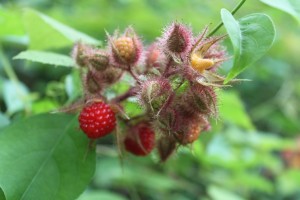
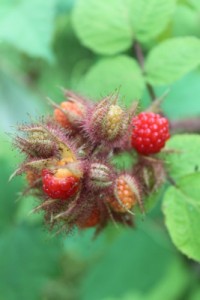
Sometimes life gives you lemons and we all know we are supposed to make Lemonade. I, frankly, am fine with lemons as long as they are in the context of all you can do with them in the kitchen. Sometimes life gives you extra special little surprises – right outside you very own door. Yesterday I was out doing a little roaming around and couldn’t help but take the camera to these amazingly beautiful specimens coming into their own in our yard. Not only was I happy to see the berries themselves, I was totally intrigued with these plants’ protective covers to the emerging berries. I thought the whole picture was just beautiful. My friend Roseann Tully, publisher of Intermezzo Magazine, says these should be covered with bees. They are not and so I am going to do some monitoring of the situation today to see if the pollinators are working in and around the area. I am concerned to report that the bee population in our yard this year is definitely diminished. You all know how I feel about this. You can visit my Facebook Page, On Behalf of Bees to catch up on legislative progress, or the lack thereof on this subject.
Anyway, what shall I do with these wild little gems of mine? I am plotting to get them into a basket and into my kitchen before the birds feast on them. I think I will begin to “harvest” this morning.
Yesterday’s recipe for Raspberry and Goat Cheese Muffins would be a good starting point, recipe-wise. But, I am determined to find some other choice Raspberry Recipes. You know there are just multitudes of great fruit recipes around, so finding some which are a little different or interesting is always my goal. Here are just a couple I stumbled upon today:
*************************************************************************************************************************
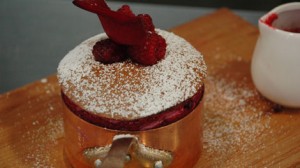
RASPBERRY SOUFFLE -courtesy SBS Food
- Cuisine: French
- Prep Time: 30 min(s)
- Cook Time: 25 min(s)
- Serves 4

ingredients:
softened butter
freeze-dried raspberry powder (see note)
2–3 punnets of raspberries
1 tbsp water
50 g caster sugar
1 heaped teaspoon cornflour
juice of 1 lemon
4 egg whites (125 g)
icing sugar to dust
rose petals to serve

Preparation
Whisk a spoonful of the egg whites through the cooled raspberry mixture until thoroughly combined. Use a spatula to gently fold the raspberry mixture through the bowl of remaining egg whites until there is no egg white visible.
Freeze-dried raspberry powder is available at specialist cooking stores or online. As an alternative to using raspberry powder, you can simply coat the dishes in sugar.
**************************************************************************************************************************
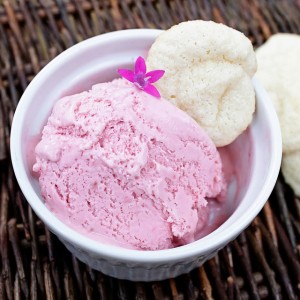
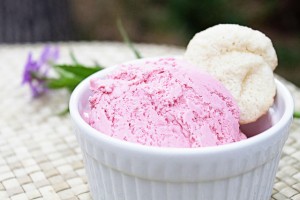
Raspberry Ice Cream – Courtesy Two Tarts
- 3 egg yolks
- 3/4 cup half-and-half
- 1/2 cup sugar
- 3/4 cup heavy cream
- 3/4 pint raspberries
- 2 tbs sugar
- a couple drops vanilla extract
- pinch of salt
Whisk the egg yolks briefly in a small bowl. Set a strainer over a heat-proof bowl. Heat the half-and-half and 1/2 cup sugar in a heavy-bottomed pot over medium heat, until sugar dissolves. When hot whisk a little of the hot half-and-half into the egg yolks and then whisk warm yolks into the hot mixture. Cook over medium heat, stirring constantly, until it thickens enough to coat the back of a spoon. Do not let it boil. Remove from the heat and quickly strain. Add the heavy cream. Cover the mixture and chill. Puree the raspberries in a food processor, and strain the puree to remove the seeds. (It will take some help from your fingers to press the raspberries through while the seeds remain in the strainer.) Stir in the 2 tbs of sugar, and once the sugar has melted, add the berries to the cold cream mixture. Add vanilla and salt. Chill thoroughly and then freeze according to your ice-cream maker’s instructions.
**************************************************************************************************************************
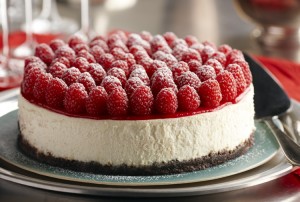
http://www.driscolls.com/recipes/view/4194/Raspberry-Cheesecake-with-Grand-Marnier
***************************************************************************************************************************
REALLY RASPBERRY COCONUT TART – adapted from Alice Medrich
For the crust:
2/3 cup unsweetened shredded dried coconut
1/3 cup sugar
8 tblsp unsalted butter, melted and still warm
3/4 tsp pure vanilla extract
1/4 tsp salt
1 cup all purpose flour
For the filling:
2 tblsp sugar
1 tblsp all purpose flour
6-7 cups raspberries, preferably organic
zest of one orange
1 tsp grand marnier
powdered sugar for dusting
whipped cream or creme fraiche for serving
To make the crust: position a rack in the lower third of the oven. Place your darkest, heaviest baking sheet (or pizza stone) on the rack and preheat the oven to 425F. Set a medium bowl near the stove. Spread the coconut in a wide heavy skillet, set over medium heat and stir constantly until the coconut begins to color slightly. Turn the heat down (once hot, coconut can burn quickly) and continue to stir until the coconut is mostly light golden brown flecked with some white. Immediately scrape the coconut into the bowl.
Stir the sugar, melted butter, vanilla and salt into the coconut. Add the flour and mix just until well blended. Press the dough evenly over the bottom and up the sides of a 9 1/2″ tart pan with removable bottom. To avoid ending up with extra-thick edges, press the dough squarely into the corners of the pan.
To make the filling: Mix sugar, flour, zest, and grand marnier together in a medium bowl. Add 2 1/2 cups berries with a rubber spatula and gently fold or toss to coat them with the sugar mixture. Pour the berries (including any loose flour or sugar) into the crust and spread them evenly. Set the pan on a square of foil, and fold the edges of the foil up and loosely over the edges of the crust to protect them temporarily. Set on the hot baking sheet and bake for 15 minutes. Turn the oven down to 350F. Unfold the foil to expose the crust edge and bake until the crust is deep golden brown and the berry juices are bubbly, 25-30 minutes more. About halfway through, use a fork to gently break up the berries. Remove the tart from the oven and arrange the remaining berries attractively, as closely together as possible, over the hot berries. Cool completely on a rack. Remove the sides of the tart pan and dust the tart with powdered sugar before serving – plain, or with whipped cream, creme fraiche or ice cream. The tart is best served within a few hours of baking.
An addendum (5pm): add 1/2 pint fresh raspberries to Ina Garten’s Brownie Pie – http://www.foodnetwork.com/recipes/ina-garten/brownie-tart-recipe/index.html – and drizzle with raspberry coulis
*************************************************************************************************************************
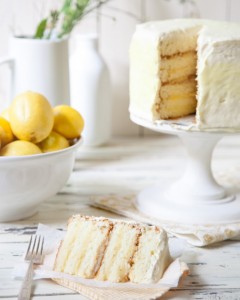
Incidentally, when life does give you lemons, make one of these – and, you can even decorate them with raspberries!
(This recipe is adapted from a Bo Friberg Recipe)
Difficulty: Intermediate
Yield: 1, 8″ layer cake
Prep Time: 20 minutes
Bake Time: 35 minutes
Cooling Time: 1 hour
Decorate Time: 1 hour
Tools:
2, 8″x3″ cake pans
Stand mixer with paddle attachment and whisk attachment
Bowls
Cake round
Large offset icing spatula
Small icing spatula
Ingredients:
3/4 cup oil
8 egg yolks
3/4 cup lemon juice
1/4 cup water
1/2 tsp. vanilla extract
4 lemons, zested
14 oz. cake flour
14 oz. sugar
1 1/2 tbsp. baking soda
1 tsp. salt
8 egg whites
2 cups lemon curd filling, recipe below
1 qt. buttercream frosting, recipe below
Yellow food coloring
Instructions:
Bake the cake layers:
1. Preheat an oven to 375°F. Butter and flour the bottoms (but not the sides) of the two cake pans
2. Sift together the flour, 4 oz. of the sugar (reserve the other 10 oz. for later), baking soda, and salt. Set aside.
3. Mix together the oil and eggs until evenly blended.
4. Add the lemon juice, water, vanilla, and lemon zest. Mix in well.
5. Add the dry ingredient mixture and mix in until evenly distributed. Beat the mixture on medium-high speed for a minute. Set the batter aside.
6. In the bowl of a stand mixer, beat the egg whites until a foam forms. Slowly add the 10 oz of the remaining sugar. Whip at high speed until the meringue forms stiff peaks.
7. Carefully fold the meringue, in three additions, into the cake batter.
8. Evenly distribute the batter into the prepared cake pans.
9. Bake for 35 to 40 minutes or until the center of the cake springs back when pressed lightly.
Prepare the filling and frosting:
10. Set out to cool. In the meantime prepare the curd and the buttercream frosting.
11. Separate 1 cup of the buttercream frosting and mix a little yellow food coloring into it to create a bright yellow color. Set aside.
Assemble the cake:
12. Once the cake layers have completely cooled, slice each into 3 separate layers, each about 1″ tall.
13. Place the first layer on a cake round or cake plate. Spread a fifth of the lemon curd over the top layer.
14. Repeat this four more times, topping with the last layer of cake. You should have a 6-tiered cake, with lemon curd between each layer but not on top.
15. Spread a very thin layer of uncolored buttercream frosting on the top and sides of the assembled cake. You should still be able to see the cake through the thin layer of icing, but no crumbs or cake should be visible. This is called dirty icing and makes the final icing much easier as it keeps the cake or crumbs from getting mixed into the frosting. Place in the refrigerator for 20 minutes until the frosting has hardened.
Decorate the cake:
16. Once the dirty icing layer has hardened, remove the cake from the fridge and spread the uncolored buttercream frosting on the top and side of the cake. Using a large offset spatula, smooth the top of the icing with one gentle movement. Clean the spatula off and now run it along the side of the cake in one fluid movement to smooth the side of the cake.
17. Using a small icing spatula, apply small dabs of yellow frosting to the side and top of the cake. Using the small spatula, create small horizontal streaks and stripes with the yellow frosting.
18. Using a clean large offset frosting spatula, run it along the top of the cake in a smooth motion to even out and dissipate the yellow stripes. Clean the spatula and repeat on the side of the cake to reduce the intensity of the stripes and to blend them into the white frosting.
Note: Spatula marks (whether created from the edge of the spatula, or from the spatula being lifted from the cake) are okay and fine to leave on the cake as it gives it a more homemade feeling. The frosting doesn’t need to be perfect.
19. Store the cake at room temperature for up to 4 days or in the refrigerator for up to a week.
or, this:
**************************************************************************************************************************
I’m off today to have a few repairs done on my computer………..
Wonderful shots from New Vernon this morning – I am so heartened to see these last vestiges of the rural Harding I remember from my childhood:
More from the yard today:
